Introduction
To start with, I suggest you to watch this short video showing baking in a wood-fired bread oven.
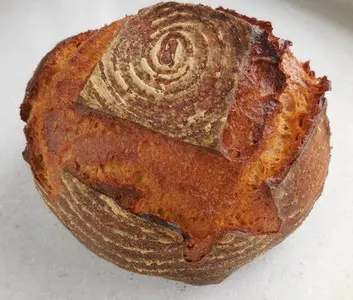
Bread: the staff of life
Few foods are more heavily charged with symbolism than bread, and the French language is full of expressions based on it: "Du pain et des jeux" (bread and games, an expression from the Roman Empire), "Manger son pain blanc" (to eat one's bread white, meaning "enjoying a period of prosperity"), "Lui faire passer le goût du pain" (make him lose the taste for bread, meaning "to kill him"), etc. And yet bread is so simple: flour, water, salt, something to make it rise, leaven or yeast and there you have it. This is the basic principal, but from here on it's a little more complicated because:- Each of these ingredients can vary in proportions, quality and temperature.
- The way the dough is prepared, how it is worked and the resting times are as least as important as the ingredients.
- Cooking also influences the end result with different times, temperature and type of oven.
What will I need?
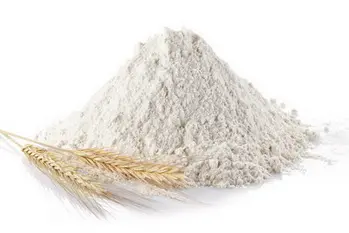
As I have already mentioned, bread is made with very few ingredients. Here they are in more detail.Flour
Water

Salt
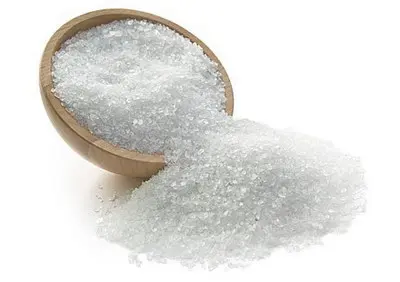
The salt you use can be pretty much any type you like, from the simplest (table salt) to the very chic (such as French Guérande salt). This will have little if any effect on the flavour of your bread, though it is always nicer healthier, surely, to eat bread made with coarse greyish sea salt rather than the fine industrial version. Important: for salt there is a strict rule - 18 grams of salt per kilogram of flour, maximum (or half an ounce to 1lb 12oz). These days the trend is towards using less (we generally eat too much salt in our diet), more like 16 grams (half an ounce to 2lbs of flour). Compare this with the 24 grams used in the mid-twentieth century...
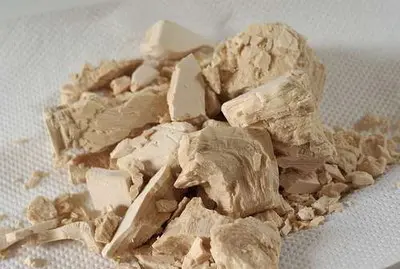
Something to make the dough rise
Yeast
Leaven
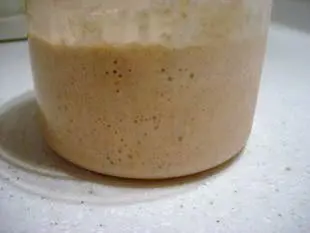
Or both yeast and leaven
We should avoid the mistake of treating these as equal and trying to find an equivalence, as if X ounces of yeast = Y ounces of leaven. Leaven recipes are simply not the same as those based on yeast and we should not compare them. Yeast makes bread rise rapidly but adds little to the flavour. With leaven it’s the other way round: the bread rises more slowly, less dramatically, but there is a phenomenal boost to the flavour.We can also combine yeast and leaven, with the effects and flavour of both. This makes for a very happy marriage that you will find in lots of the recipes on this site.
The stages
Now you know what goes into bread, how do we make it? Well, it’s a very precise process, involving 12 immutable stages:- Kneading: This is the stage when the ingredients are mixed together and worked to make the dough. This can be sub-divided into three steps:
- Mixing: The simple combining of ingredients which usually takes 3 to 4 minutes.
- Autolysis: This optional stage consists of mixing just the water and flour and leaving it to rest for at least 30 minutes. This improves the dough structure and helps later with retention of the fermentation gases.
- Kneading proper: Now the mixed ingredients are kneaded together (if you have already done the autolysis stage, it is the time to add the salt and yeast) until the dough is fully formed. At this point, the dough takes on its structure, the gluten network develops and it can hold the CO2 during the fermentation that follows and allow the bread to rise.
- Resting: This is the first bulk resting or rising phase for the dough, in a tub or bowl, protected from draughts, when the dough begins its fermentation.
- Division: After its first rising, the large mass of dough is cut up into pieces of a certain weight, depending on what type of bread is being made. For French baguettes, for example, the pieces weigh 350 g (12 ounces).
- Forming: From irregular lumps of dough after weighing, we now shape the bread into something near its final form to await the next stage. This might be a ball or a long loaf.
- Relaxation: This is the second brief resting period for the shaped dough. This takes a quarter of an hour, just the time for the dough to relax.
- Shaping: Now the loaves are given their final desired shape. The dough, already more or less in the right form, can now be styled as a specific type of bread.
- Final proving: The loaves in their finished shape begin their third and final resting and rising stage.
- Scarification or slashing: The risen loaves are now ready to go in the oven. Just before, we make cuts in the top with a fine blade. This creates a weakness in the dough, causing attractive gaps to open up during cooking.
- Loading the oven: The loaves are arranged on the floor of the hot oven and steam (water vapour) is introduced to produce a golden crust.
- Baking: The loaves rise in the oven’s heat and develop their flavour and colour. The golden crust and openings form.
- Unloading the oven: We take the loaves out of the oven and put them on a rack to cool.
- Cooling: This is the time it takes for the bread, which has come burning hot from the oven, to come down to room temperature ready for eating.
As you can see, there this a certain rigour to this sequence – this is a specific feature of the French bakery tradition and one of the secrets of successful bread-making.
A few tips
Here are a few helpful hints for beginners who would like to embark on the adventure of making their own bread, something I’d strongly encourage you to try.- Don’t get discouraged: You might not succeed first time, but the important thing is not to let that put you off. Just to reassure you, I can’t tell you how many disasters I had to begin with: burnt, undercooked, flat, tasteless, etc. (there’s a series of photos that I look at from time to time and have a good laugh over. Well, I can do that now, but at the time...!)
- Bread-making is not an exact science: a bit like cooking in general but, unlike cake-making and patisserie, bread loves the baker’s "hands-on" experience when it comes to timings, proportions, etc. By that I mean that, starting with a basic recipe, you will be able to modify it to suit your own ingredients and equipment as soon as you begin to "get the feel" for it.
- The importance of ingredients: Above all, don’t skimp on the quality of your ingredients, especially the flour and water. Heavily chlorinated tap water or supermarket flour full of additives will significantly reduce your chances of success.
- Essential time: working the dough: Anyone can mix the ingredients, but from there on, particularly for certain kinds of bread, how the dough is worked, with the turning, folding and resting, makes all the difference to its consistency and contributes to the flavour. This is why a recipe that is merely written (without photos) is much harder to follow well.
- Baking: hot!: Whatever kind of oven you use, normal domestic or proper bread oven, it would be really frustrating to ruin a lovingly prepared batch in the cooking. Pay attention to this stage, like the others: not too hot, not too cold, and with plenty of steam.
- Taking out of the oven: a moment of sheer delight! Ah, when you get that far and your bread has worked, you will appreciate this magical moment: taking a beautiful loaf out of the oven, admiring its colour and smell, hearing the crust crackle, cutting off the end to taste it right away, all crusty and piping hot – close to bliss!
In praise of home-made bread
I love cooking, as you will have gathered while pottering around this site, but making bread is much more than a bit of amateur baking.Kneading, working the dough, shaping the loaves, putting them in the oven, baking and taking the finished loaves out are extraordinary moments. I never tire of it, even after all this time (I started in 2004). Even better, I am still learning, with each batch, as I continue baking, from the successes and the mistakes. Gradually my bread is improving; I’m discovering tricks, gestures, new proportions or ingredients. And the pleasure is always fresh.
It’s rather difficult to explain, but there is something magical about making your own bread, which must have something to do with the strong symbolism associated with bread that I mentioned at the top of the page. It’s also because not much can match a golden crusty loaf that’s just come out of the oven!
I’ll finish by letting you into a secret: when you cook, sharing doubles the pleasure, but when you bake bread, it’s even better. Gather with friends around a table, with fresh bread, some little snacks to munch, a few bottles and, believe me, life is worth living…
Conclusion
I hope that what you have read will make you want to have a go. Above all, don’t worry if this seems like a lot to take in all at once, and that you’ll forget something. The recipes on this site remind you of everything you need to know at the right time. Of course, if – in spite of my best efforts – there’s a mistake in a recipe, an error or something that’s not clear, please do let me know. I will be delighted to reply to you.In short: Just make some bread, you’ll love it!